

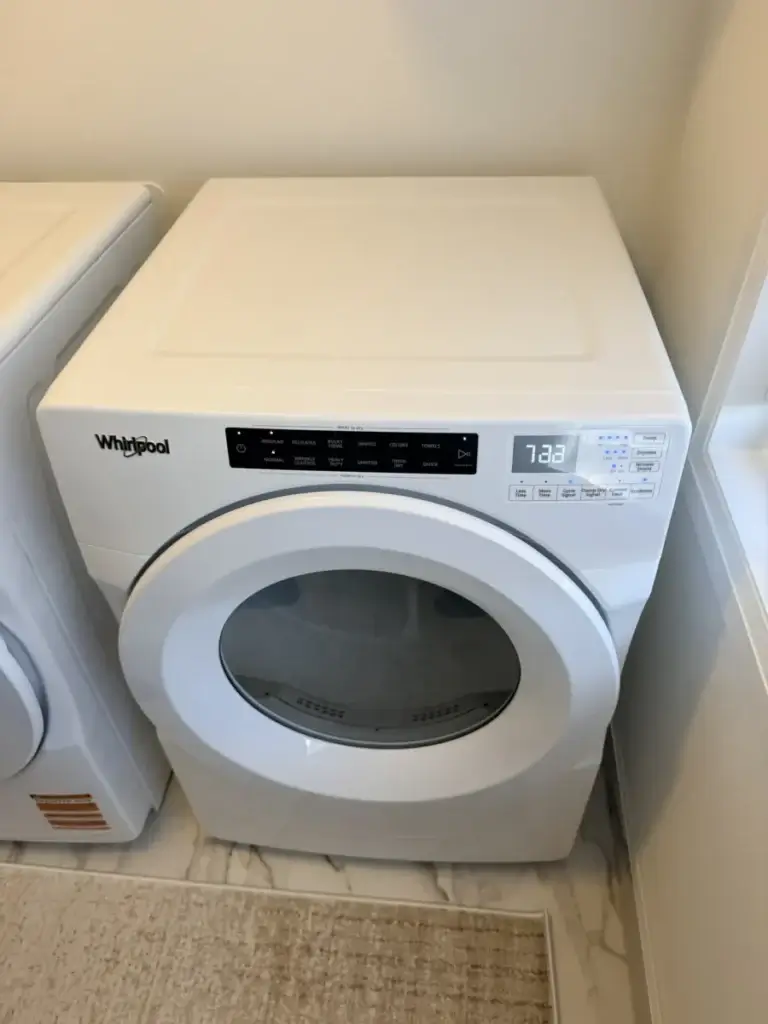
3-second answer: If your clothes come out cold and wet at the end of the cycle while the drum is still tumbling, the dryer has lost its heat source. Four out of five times the cause is one of three things: a blown thermal fuse (electric and gas dryers — a safety device that trips on overheat, almost always with a clogged vent as the real root cause), a burnt-out heating element (electric dryers — the coil corroded or broke), or a failed gas valve coil (gas dryers — the solenoid that opens the gas valve died). All three are diagnosable in 15 minutes with a $15 multimeter, and most are DIY-fixable on a 240V electric dryer. Gas dryer work — anything past the thermal fuse — is a job for a TSSA-certified tech in Ontario.
In this guide
- The 7 most common causes
- Electric vs gas dryers — which components matter for you?
- 5-step DIY diagnostic
- When the thermal fuse keeps blowing
- Brand-specific notes (Samsung, Whirlpool, LG, Maytag)
- Repair vs replace — GTA cost ranges
- Vent maintenance — the prevention nobody does
- When to call a GTA pro
- FAQ — 10 quick answers
The 7 most common causes of a clothes dryer that won’t heat
A clothes dryer has two independent systems — the motor that spins the drum, and the heat source. When the motor’s working but the heat isn’t, the failure is somewhere in the heat circuit. Across the GTA, York Region, and Simcoe County, here are the seven causes we run into most often, in roughly the order you should rule them out.
1. Blown thermal fuse
This is the single most common cause of a no-heat dryer — and the symptom most people misdiagnose. The thermal fuse is a small one-shot safety device, usually mounted on the blower housing or near the heating element, that physically melts open if the dryer’s exhaust temperature exceeds a safe limit (typically ~190-205°F / 88-96°C). Once it’s blown, no current reaches the heater and the dryer tumbles cold air. A thermal fuse doesn’t “reset” — it must be replaced (~$15 part).
The catch: a thermal fuse rarely blows on its own. It blows because something upstream made the dryer overheat — 95% of the time that’s a clogged vent or a bad cycling thermostat. Replace the fuse without fixing the upstream cause and the new fuse blows on the next load.
How to spot it: No heat at all, but the drum tumbles and the timer advances normally. Multimeter test (with the dryer unplugged): probes on the two fuse terminals → should read near-zero ohms (continuity). Open circuit (OL / infinity) = blown.
2. Burnt-out heating element (electric dryers)
The heating element is a coiled resistance wire inside a metal housing, mounted along the back or side of the drum. It runs on 240V and dissipates about 5,400 watts. After 8-12 years of daily cycling, the coil eventually corrodes, breaks, or develops a hot spot that arcs to the housing — at which point a breaker trip or thermal fuse blow follows. Sometimes you can see a visible break in the coil; other times it’s an open circuit hidden inside the ceramic standoffs.
How to spot it: Drum tumbles, thermal fuse is good, but no heat. Multimeter across the element terminals → should read 10-15 ohms on a healthy element. Infinity = burnt out. Visible glow when running = element is fine (but cycling thermostat might not be).
3. Failed gas valve coils (gas dryers)
On a gas dryer, two or three small electromagnetic coils sit on top of the gas valve. When the cycle calls for heat, the control board energizes the coils, the plungers lift, gas flows past the open valve seats to the burner tube, and the igniter lights it. If one coil weakens (typical failure after 6-10 years), the plunger doesn’t lift far enough, gas doesn’t flow, and you get the classic gas-dryer no-heat symptom: the igniter glows orange, glows hotter, glows orange-white, then turns off — and nothing happens. Drum keeps tumbling, no heat.
How to spot it: Watch the igniter through the access panel during a heat cycle. Glows brightly and cycles off without ever igniting gas → coils are weak. Coils are sold as a kit ($40-60) and replaced as a set, not individually.
4. Bad igniter (gas dryers)
The igniter is a small ceramic component that glows orange-hot to light the gas. It’s brittle and fails by cracking or breaking the filament inside. When the igniter’s dead, the control sends current expecting to see the resistance, doesn’t, and the cycle never opens the gas valve. Result: no heat, no orange glow at all when you peek through the access panel.
How to spot it: Open the lower access panel; run a heat cycle. If you see no orange glow at all where the igniter sits, that’s your fault. Multimeter test: igniter should read 50-400 ohms. Infinity = cracked.
5. Tripped high-limit thermostat
The high-limit thermostat is a resettable safety, usually mounted on the heating-element housing. It opens the heat circuit if the temperature exceeds a safe threshold (typically ~250°F / 121°C) and closes again when the temperature drops. Unlike the thermal fuse, it self-resets — but if it’s tripped right now (e.g., you just ran two heavy loads on a clogged vent), the dryer reads as no-heat. If the thermostat itself has failed open (stuck in the tripped state), the symptom is permanent and only a replacement fixes it.
How to spot it: Cold dryer with the unit unplugged → multimeter should show continuity (closed). Open circuit on a cool dryer = thermostat failed and needs replacement.
6. Failed cycling thermostat (operating thermostat)
The cycling thermostat is what regulates the drum temperature during a normal cycle — closing to call for heat when the drum cools, opening to cut heat when the target is reached. When it fails closed, you get continuous heat (your clothes scorch) and the high-limit and thermal fuse usually trip. When it fails open, you get no heat and clean (untripped) safety devices. The second pattern is the one you’ll see as “no heat.”
How to spot it: All safety devices test good, element/coils test good, but no heat. Multimeter on the cycling thermostat at room temp → should show continuity. Infinity = failed open.
7. Severely clogged dryer vent
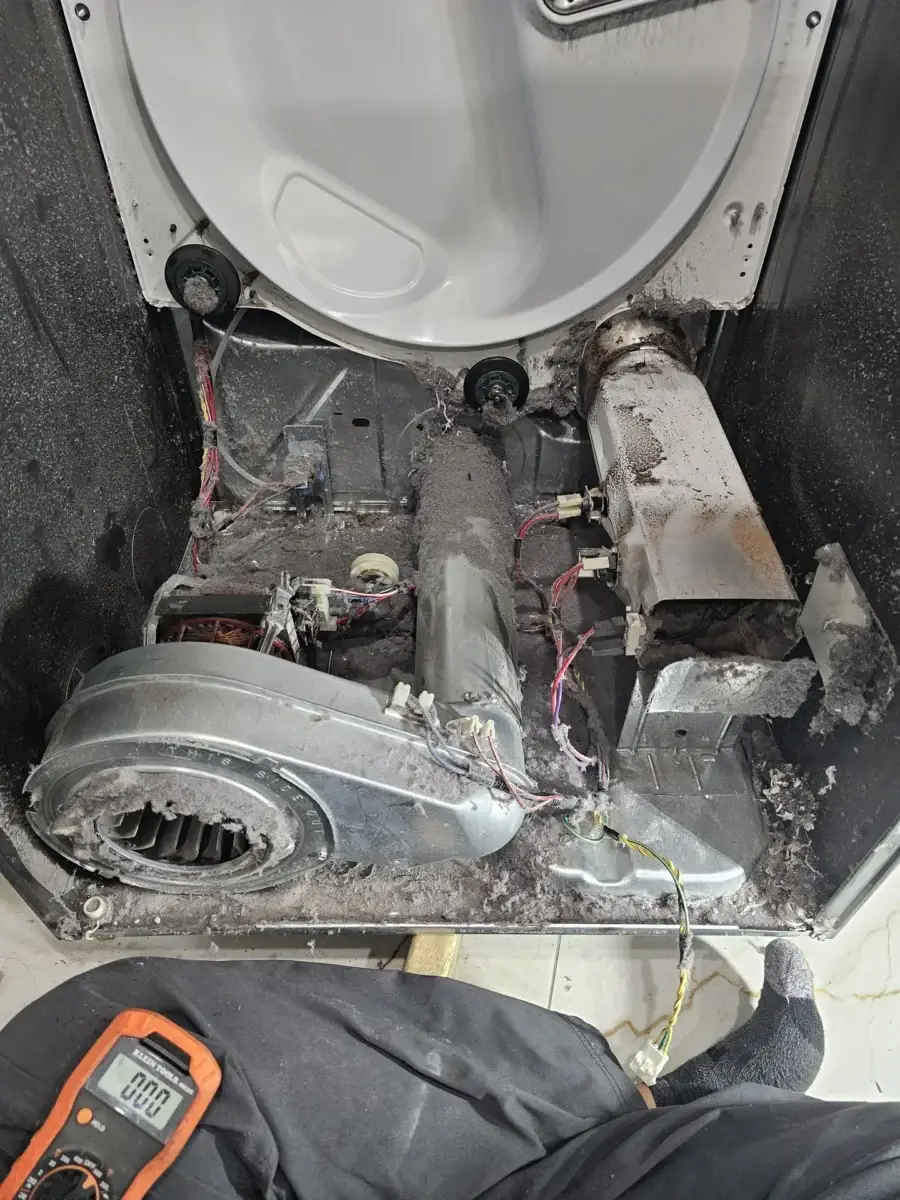
This is the root cause behind a huge share of “no heat” calls — and the one most owners don’t recognize as a vent problem because the visible symptom is the same as a dead heating element. A clogged vent restricts exhaust airflow, drum and housing temperatures spike, the high-limit trips, the thermal fuse eventually blows, and the dryer goes no-heat. Replace the fuse without clearing the vent and you’re back to no-heat in days.
This is also Ontario’s leading cause of appliance-related house fires. The Office of the Fire Marshal flags lint accumulation as the #1 ignition source in laundry-room fires. If you can’t remember the last time your vent was cleaned end-to-end (dryer → flexible hose → exterior wall cap), that’s where to start before replacing any parts.
How to spot it: Recent history of “drying takes longer than it used to” → repeated thermal fuse blows → no heat. Visible lint coming from the exterior vent cap is dust-coloured rather than puffing freely. If your dryer is hot to the touch on the side panel within 20 minutes of starting, that’s a vent restriction.
Electric vs gas dryers — which components matter for you?
Knowing which dryer type you have narrows the diagnostic significantly. Electric dryers use a 240V resistance heating element and have neither an igniter nor gas valve coils — those don’t exist in the unit. Gas dryers use natural gas or propane combustion via an igniter and gas valve, and have no resistance heating element. Both share the thermal fuse, both safety thermostats, and the cycling thermostat.
The two are easy to tell apart: gas dryers have a gas supply line (yellow flex hose) connected to the back; electric dryers don’t. Electric dryers also use a 4-prong 240V outlet (or older 3-prong); gas dryers use a normal 120V outlet for the motor and controls.
If you have an electric dryer: rule out thermal fuse → heating element → cycling thermostat → high-limit, in that order. Skip the gas-valve and igniter sections entirely.
If you have a gas dryer: rule out thermal fuse → igniter → gas valve coils → cycling thermostat → high-limit. Skip the heating-element section. Also: any gas-side work in Ontario should be done by a TSSA-certified technician — that’s the law, not a preference.
5-step DIY diagnostic
Set aside 30 minutes, a $15 multimeter, a Phillips and flathead screwdriver, and a nut driver set. Always unplug the dryer (or flip the breaker AND shut the gas valve for a gas dryer) before opening any panel. Work in this order:
Step 1 — Confirm power and gas supply
Electric dryer: a 240V dryer is fed by TWO breakers (a tandem breaker or two singles tied together). If only ONE leg has tripped — which happens more often than you’d think — the dryer will tumble (120V is enough for the motor) but won’t heat (heater needs both 240V legs). Reset both breakers firmly. Gas dryer: confirm the gas-line shutoff at the dryer is in the open position (handle parallel to the pipe) and that no other gas appliance in the house has issues that might suggest a main-line problem.
Step 2 — Test the thermal fuse
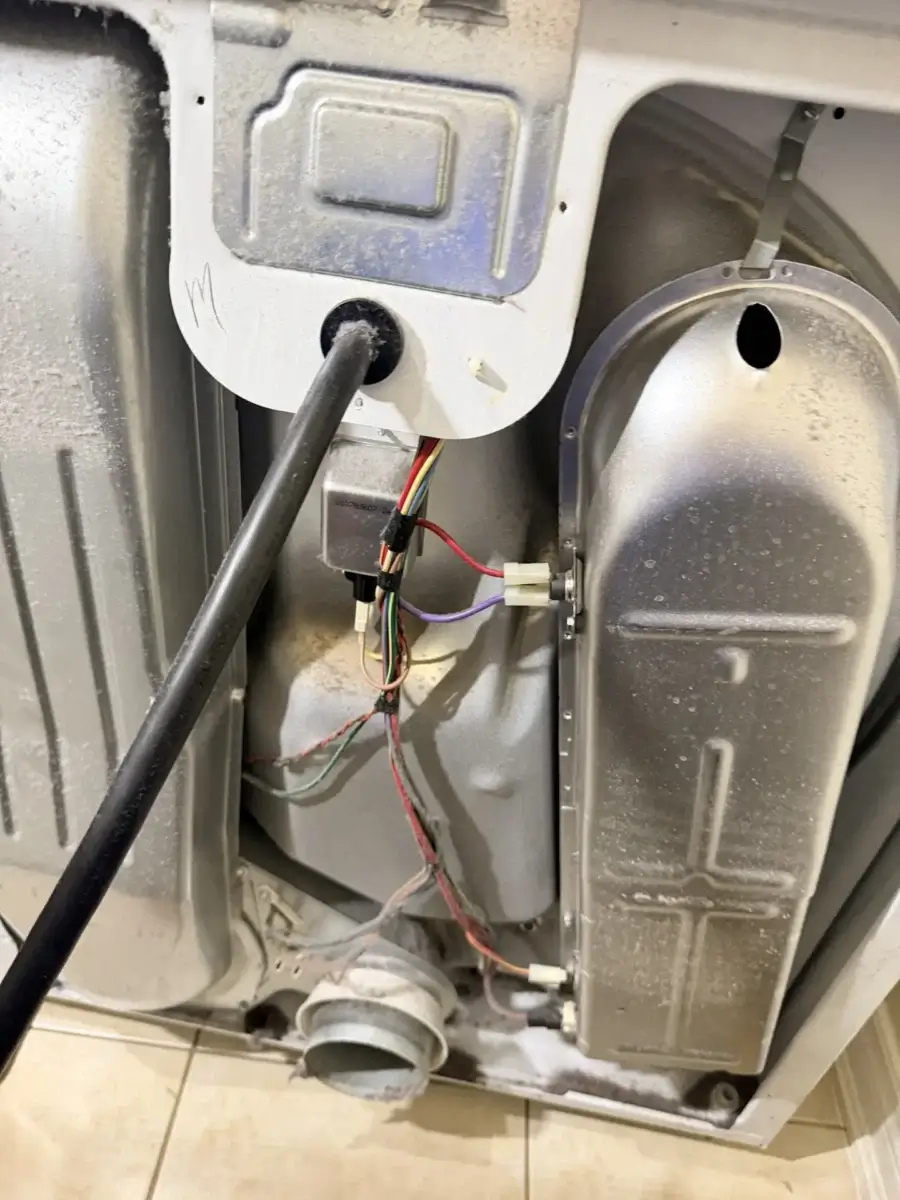
Unplug the dryer. Pull off the back panel (usually 6-10 screws on the top edge). Locate the thermal fuse — small white ceramic body, two wire terminals, typically mounted on the blower housing on Whirlpool-platform dryers or on the heater housing on Samsung/LG. Disconnect one wire from a terminal. Touch your multimeter probes (set to continuity or low-ohms) to each terminal. Healthy = beep / near-zero ohms. Open = blown, replace it ($10-20 part). If you replace it: also clean the vent thoroughly or it’ll blow again.
Step 3 — Inspect the vent end-to-end
Pull the dryer forward 60cm. Disconnect the flex-hose clamp at the back of the dryer. Look inside the dryer exhaust port — wad of lint? Clean it. Detach the flex hose from the wall, take it outside, and shake all the lint out. Go to the exterior wall cap and clean it — flap should move freely. Run a vacuum hose through the full run if you can. A surprising number of “dead element” calls turn out to be vent jobs.
Step 4 — Test the heating element (electric) or igniter (gas)
Electric: with the back panel still off, find the heating element housing (usually a long boxy tube on the back wall). Two terminals on the outside; disconnect the wires and touch a multimeter to the terminals. Healthy element = 10-15 ohms. Open circuit = burnt out, replace ($50-110 part). Gas: open the lower access panel at the front. Locate the igniter (small ceramic finger-shaped part near the burner tube). Disconnect both leads, multimeter on its two ends. Healthy = 50-400 ohms. Infinity = cracked, replace.
Step 5 — If the easy parts test good, isolate with a no-heat cycle
If the thermal fuse, vent, and element/igniter all check out: plug the dryer back in (gas dryer: leave the gas off) and run a heat-call cycle. Watch and listen. Electric: drum tumbles, no heat → high-limit or cycling thermostat is open. Pull each one off and multimeter both — replace whichever shows infinity at room temperature. Gas: drum tumbles, igniter glows orange-white but no flame ever lights → gas valve coils. Replace as a kit ($40-60 part). For coil work or gas-valve testing on a gas dryer, this is the point to call a tech if you’re not certain — improper work on a gas appliance is a TSSA Act violation in Ontario.
Thermal fuse and vent clean, element/igniter test good, and the dryer still won’t heat? That points to a control-board fault, a gas valve coil that needs gas-side service, or a wiring break — components that need a tech. Book a same-day GTA appointment: 647-834-4646 ($89 service-call applied to the repair if you go ahead).
When the thermal fuse keeps blowing
If you’ve replaced the thermal fuse and it blew again within a week — sometimes within a single load — stop changing fuses and investigate the heat source. The fuse is doing exactly what it’s designed to do: cutting power when the exhaust temperature gets dangerous. Something is making the exhaust too hot.
Three causes, in descending order of frequency:
- Vent blockage you missed. The whole run, not just the first 6 feet. Check inside the dryer exhaust duct (sometimes lint balls up just past the blower wheel, where you can’t see it from outside). Check the bird-screen on the exterior cap.
- Failed cycling thermostat (closed). The cycling thermostat is supposed to open the heat circuit when the drum reaches target temperature. If it’s failed closed (welded contacts), the heater never cuts off, the drum overheats, and the high-limit + thermal fuse take the hit instead.
- Blower wheel slipping on the motor shaft. The blower wheel pulls exhaust air past the heater and through the vent. If its hub is cracked (common on older Whirlpool-platform dryers) it slips on the shaft, airflow drops to nothing, and exhaust temperatures spike.
Beyond two thermal-fuse replacements in a row, this is genuinely a job for a tech — both for time-savings and because the underlying overheat is a real fire risk you don’t want to leave on a “let’s try one more fuse” cycle.
Brand-specific notes
Samsung
Samsung dryers (DV-series) commonly show heat-circuit codes as HE (heater problem), HE2 (overheat — same family as a tripped high-limit), or tS / tO (temperature-sensor fault). The Samsung heating element sits in a stainless housing on the back wall and is straightforward to replace. The thermistor (temperature sensor) attached to the heater housing is a common failure separate from the element itself — it’s a 5-minute swap. Samsung repair covers the full code list and access procedure.
Whirlpool / Maytag / Amana / Kenmore (shared 27″ platform)
These four brands share the same chassis on most 27″ front-load dryers built between 2008 and present. The thermal fuse mounts on the blower housing. The element is in a tube on the back wall. Whirlpool’s most-common no-heat code is F01 (control-board fault — see our Whirlpool F01 deep dive), and the F22 / F26 codes both relate to thermistor faults. Whirlpool repair and Maytag repair share most of the diagnostic flow.
LG
LG dryers throw tE (thermistor error) for most heat-circuit faults — sometimes a real bad sensor, sometimes a wiring harness break, sometimes the control reading a perfectly good sensor that’s seeing genuinely too-low intake air (vent blockage). LG gas dryers throw FE for flame error which means the burner never lit — igniter, gas valve coils, or gas supply, in that order. LG repair details access for the LG-specific back-panel layout.
GE / Frigidaire / Electrolux
GE dryers use a similar electric heating element + thermal fuse layout to the Whirlpool platform but with a slightly different cabinet, accessed from the top rather than the back. Frigidaire and Electrolux share a chassis with a more compact heater housing — common failure is the heating element retaining bracket cracking and shorting the element against the housing.
Repair vs replace — what it costs in the GTA
Honest framing: not every no-heat dryer is worth fixing. Here’s our typical service-call breakdown across GTA + York + Simcoe homes:
- Thermal fuse + vent clean: $89-130 total. Service-call rate plus the small part. Covers ~40% of no-heat calls.
- Heating element replacement (electric, under 10 years old): $210-280 total. Worth it — $210 to extend the life of a $700-1,200 dryer is the right math.
- Gas valve coils kit (gas dryer): $210-270 total. TSSA-certified service required — DIY isn’t legal in Ontario for gas-side work.
- Igniter replacement (gas dryer): $190-240 total.
- Heating element + control board (10-15 years old): $420-560 total. Borderline — depends on cabinet condition, drum bearings, and door seal.
- 15+ years old, multi-component failure: Replace. New entry-level dryer $650-900 installed; matched stacked Samsung/LG sets $1,400-2,000.
Across our GTA service area, the median no-heat dryer job in the past year was $197 — well inside repair-makes-sense territory for most units.
Vent maintenance — the prevention nobody does
If you take one thing away from this guide: clean your dryer vent annually, end-to-end. That means the lint screen (every load), the flex hose between dryer and wall (every 3 months), the rigid duct inside the wall (annually), and the exterior cap (annually). The lint screen catches roughly 80% of fibres; the other 20% accumulate downstream and gradually starve airflow.
Symptoms that say “your vent needs cleaning”:
- Drying times getting longer over months (clothes used to be dry in 45 min, now they need a second cycle)
- Dryer cabinet hot to the touch on the side panel within 15-20 minutes
- Burning or scorched smell during a cycle
- Recurring thermal-fuse failures (every 1-3 months) — see our dryer drying-time guide for the full diagnostic.
- Visible lint puffing from the exterior wall cap (good — system is exhausting). Dust-coloured trickle (bad — restricted)
Our regular-maintenance article — how to extend the life of your dryer with regular maintenance — covers the full annual checklist. For DIY troubleshooting beyond what’s in this article, see the DIY dryer repair hub.
When to call a GTA pro
Call us if any of these apply:
- It’s a gas dryer and the fault isn’t a clogged vent or blown thermal fuse — anything past those two is gas-side work and needs a TSSA-certified tech (legal requirement in Ontario)
- You’ve replaced the thermal fuse and it blew again
- The dryer trips the breaker when you start a heat cycle
- Burning-electrical smell when the dryer runs
- The drum stops tumbling at the same time the heat cuts out (suggests a wiring or control-board fault, not a heat-circuit fault)
- You don’t have a multimeter, or you’re not comfortable working inside a 240V appliance
Appliance Forever covers the entire GTA, York Region, and Simcoe County — Vaughan, Markham, Aurora, Newmarket, Bradford, Barrie, Innisfil, Scarborough, North York, Richmond Hill, and beyond. TSSA-certified for gas dryers and 30+ brands of electric dryers, factory-trained, and our $89 service call applies to the repair. Book same-day at 647-834-4646 or browse our dryer repair services.
FAQ — 10 quick answers
Why won’t my dryer heat up but it still spins?
The drum motor runs on 120V; the heat circuit runs on 240V (electric) or 120V to the gas valve and igniter (gas) — they’re separate circuits. Drum tumbling means the motor circuit is fine. No heat means the fault is somewhere in the heat circuit: thermal fuse, heating element or igniter/gas valve, a thermostat, or the control board. Ninety percent of cases come down to a blown thermal fuse (usually caused by a clogged vent) or a burnt-out heating element / failed gas valve coils.
How do I tell if my dryer’s thermal fuse is blown?
Unplug the dryer. Pull off the back panel. Find the thermal fuse — small white ceramic body with two wire terminals, usually on the blower housing or near the heater. Disconnect one terminal wire and put a multimeter (continuity setting) across the two terminals. A healthy fuse beeps or reads near zero ohms. An open circuit (no beep, OL reading) means it’s blown. Replacement fuse is $10-20 and snaps on with the same two terminals.
How much does it cost to fix a dryer that won’t heat up?
In the GTA: thermal fuse + vent clean ≈ $89-130 total. Heating element replacement (electric) ≈ $210-280. Gas valve coils (gas dryer, TSSA-certified service) ≈ $210-270. Igniter ≈ $190-240. Median no-heat dryer job in the past year was $197. We quote before any parts work; the $89 service-call is applied to the repair if you go ahead.
Can I replace a dryer heating element myself?
If it’s an electric dryer and you’re comfortable working inside a 240V appliance with the unit unplugged: yes. Pull the back panel, disconnect the element’s two wire leads, unscrew the housing, lift the old element out, install the new one (orient it the same way), reconnect, reinstall the panel, and run a test cycle. A gas dryer doesn’t have a heating element — it has an igniter and gas valve coils, both of which require TSSA-certified service in Ontario.
Why does my dryer’s thermal fuse keep blowing?
Because something is making the dryer overheat — almost always a clogged vent, sometimes a stuck-closed cycling thermostat, occasionally a slipping blower wheel. The fuse is doing its job. Replacing it without fixing the underlying overheat means the next fuse will blow within days. Clean the vent end-to-end first; if it still blows, the cycling thermostat or blower wheel needs investigation by a tech.
How do I know if my dryer is electric or gas?
Look at the back. A gas dryer has a flexible yellow gas supply line connecting to the bottom of the cabinet, plus a standard 120V plug (3 prongs). An electric dryer has a heavy 240V plug (3- or 4-prong, much thicker than a regular outlet) and no gas line. Inside, an electric dryer has a heating element; a gas dryer has an igniter and burner tube.
What does the HE error code on a Samsung dryer mean?
HE = heater problem. The control board can’t see the heating element drawing the expected current. Two-thirds of HE codes resolve by replacing the heating element or the thermal fuse. A third are caused by a bad thermistor on the heater housing giving the board false temperature readings. If HE returns immediately after a reset, you have a real fault to diagnose — not a sensor glitch.
What does the F01 error code on a Whirlpool dryer mean?
F01 is a control-board (main electronic) fault — the board itself has failed and isn’t sending the right signals to the heater circuit. Full deep dive in our Whirlpool F01 guide. F01 is one of the few no-heat causes where the board is the actual problem (not just downstream of a failed sensor); replacement is $220-310 part plus labour.
Is it cheaper to repair a dryer or buy a new one?
If your dryer is under 10 years old and the failure is a single component (thermal fuse, element, coils, thermostat, igniter), repair is usually $150-300 — a clear win against $700-1,400 for a new unit. If it’s 12+ years old with multiple failures (element AND board AND seal AND drum bearings), replacement is usually the right call. We give a straight repair-or-replace recommendation on-site, in writing.
Do you service gas dryers in the GTA?
Yes — Appliance Forever is TSSA-certified for gas appliances, which is the legal requirement in Ontario to work on gas-side components (gas valve, supply line, burner tube, igniter). Same-day appointments across the GTA, York Region, and Simcoe County for both electric and gas dryers — Samsung, LG, Whirlpool, Maytag, Kenmore, GE, Frigidaire, Electrolux, and more. Call 647-834-4646 — $89 service call applied to the repair.
Dryer still won’t heat after the DIY diagnostic?
Book a same-day appointment across the GTA, York Region, and Simcoe County. TSSA-certified for gas dryers, factory-trained for every major brand — your $89 service call is applied to the repair.
Call now: 647-834-4646